
Used room: https://tryhackme.com/room/commonlinuxprivesc
Privilege Escalation is a practice. It mainly depends upon configuration done in the system that acts as a weakness to escalate the privileges.
These configurations can be of many types. For e.g.:
- Weak credentials
- Improper access management
- Not following best practices, etc.
So, today or tonight we will see various methods to do privilege escalation in Linux.
Step 1: Enumerate the machine
Tools
SSH into the target machine

What is the target’s hostname?
Checking hostname:
Use command hostname:

Look at the output of /etc/passwd how many “user[x]” are there on the system?
Check the number of users using cat /etc/passwd


8 users are there present.
How many available shells are there on the system?
Using command: cat /etc/shells
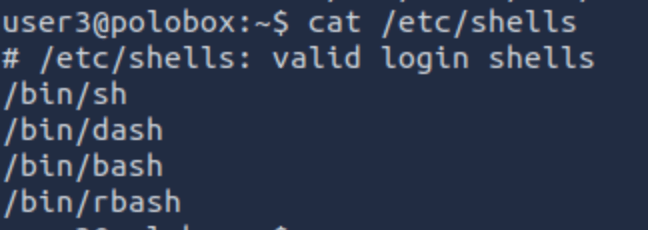
4 shells are available.
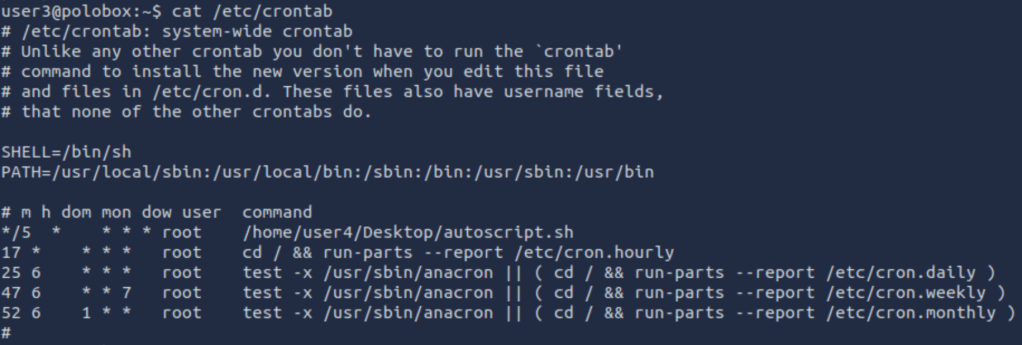
What is the name of the bash script that is set to run every 5 minutes by cron?
Using command: cat /etc/crontab
autoscript.sh
What critical file has had its permissions changed to allow some users to write to it?
passwd
After running LinEnum we found a lot of info to answer the following questions:
Method 1 – Finding and Exploiting SUID Files
The first step in Linux privilege escalation exploitation is to check for files with the SUID/GUID bit set. These are the files that can be run with the permissions of the file(s) owner/group. In this case, as the super-user.
What is a SUID binary?
In Linux, everything is a file, including directories and devices which have permissions to allow or restrict three operations i.e. read, write and execute. So when you set permission for any file, you should be aware of the Linux users to whom you allow or restrict all three permissions.
Take a look at the following demonstration of how maximum privileges (rwx-rwx-rwx) look:
r = read
w = write
x = execute
user     group     others

rwx       rwx       rwx

421       421       421
The maximum number of bits that can be used to set permission for each user is 7, which is a combination of reading (4) write (2), and execute (1) operation.
For example, if you set permissions using “chmod” as 755, then it will be rwxr-xr-x.
But when special permission is given to each user it becomes SUID or SGID. When extra bit “4” is set to the user(Owner) it becomes SUID (Set user ID) and when bit “2” is set to group it becomes SGID (Set Group ID).
Therefore, the permissions to look for when looking for SUID is:
SUID:
rws-rwx-rwx
GUID:
rwx-rws-rwx
Finding SUID Binaries
We already know that there are SUID capable files on the system, thanks to our LinEnum scan. However, if we want to do this manually we can use the command: “find / -perm -u=s -type f 2>/dev/null” to search the file system for SUID/GUID files. Let’s break down this command.
find – Initiates the “find” command
/ – Searches the whole file system
-perm – searches for files with specific permissions
-u=s – Any of the permission bits modes are set for the file. Symbolic modes are accepted in this form
-type f – Only search for files
2>/dev/null – Suppresses errors
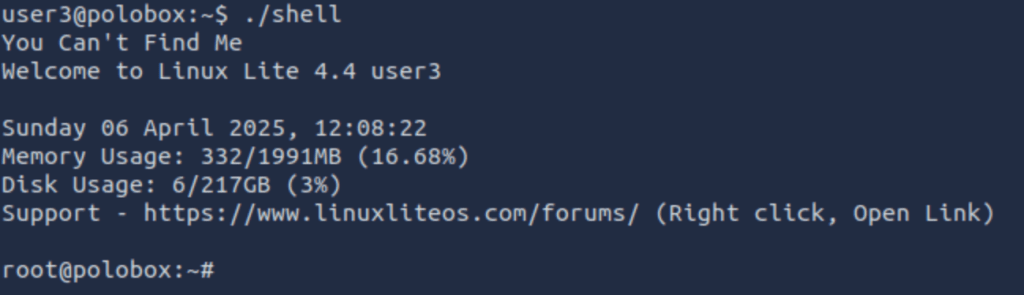
What is the path of the file in user3’s directory that stands out to you?
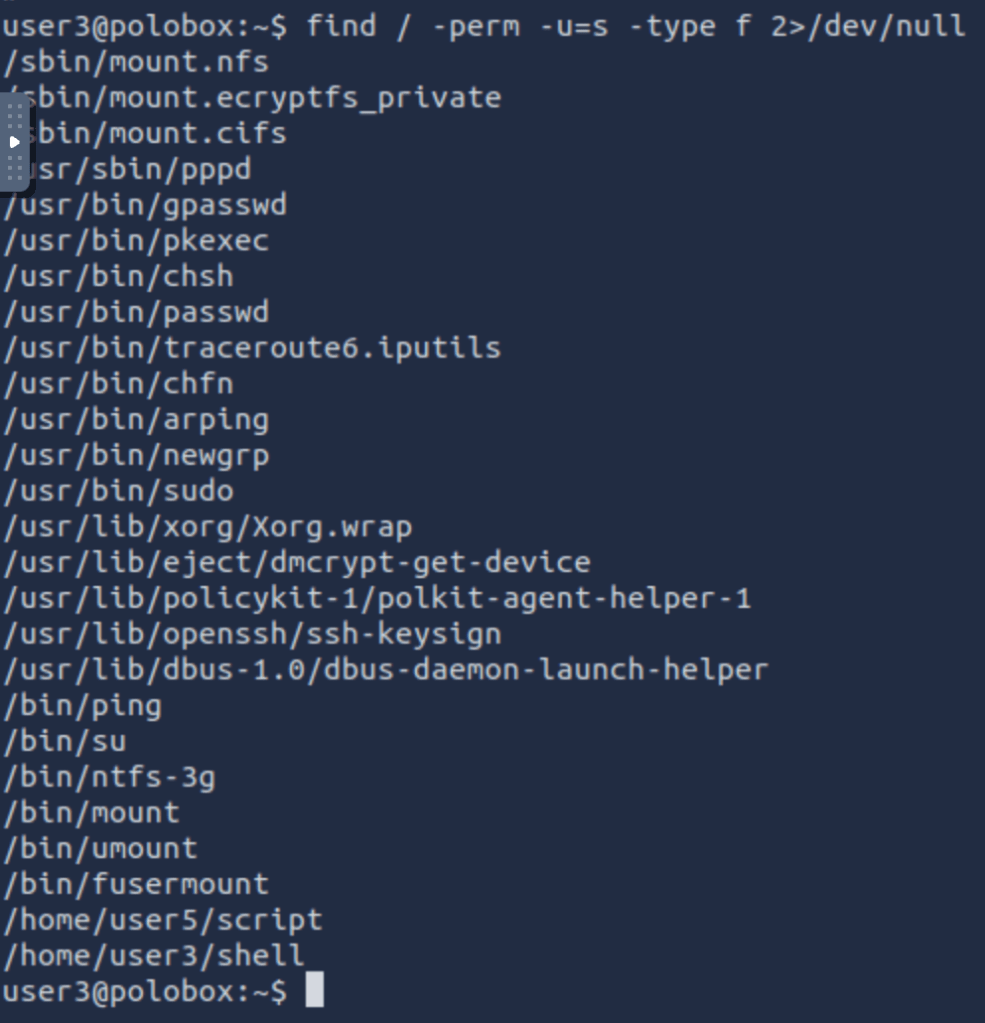
Well, “shell” is a SUID bit file, which means running it will run the script as a root user.
Method 2 – Exploiting a writable /etc/passwd
We saw that /etc/passwd for writable. So, what we will do is, create a new root user and get it listed in the /etc/passwd file.

Now logging into this user:

We are root.
Method 3 – Sudo – l
This command helps you to find commands which can be run as root without using the password.

vi can be run as sudo without password.
I opened vi as sudo using “sudo vi” command and exit the file using “:!sh” as shown below.

Upon exit it will redirect you to a shell:

Now you are root.
Method 4 – Exploiting using Crontab
The Cron daemons are processes that run commands at specific dates and times which helps us schedule activities. We can create a crontab file containing commands and instructions that will be executed by the Cron daemon.
How to view active Cronjobs.
We can use the command “cat /etc/crontab” to view what cron jobs are scheduled.
Understanding the syntax of Cronjob
Cronjobs exist in a certain format, being able to read that format is important if you want to exploit a cron job.
# = ID
m = Minute
h = Hour
dom = Day of the month
mon = Month
dow = Day of the week
user = What user the command will run as
command = What command should be run
* = All
For Example,
| # | m | h | dom | mon | dow | user | command |
| 15 | * | 1 | * | * | * | root | cd / && run-parts –report /etc/cron.hourly |
How can we exploit this?
We know from our LinEnum scan, that the file autoscript.sh, on user4’s Desktop is scheduled to run every five minutes.
It is owned by root, meaning that it will run with root privileges, despite the fact that we can write to this file. The task then is to create a command that will return a shell and paste it into this file. When the file runs again in five minutes the shell will be running as root.
What directory is the “autoscript.sh” under?

/home/user4/Desktop
Let’s change the contents of file autoscript.sh to the mentioned payload

And start the listener

Wait for a few minutes as the cronjob will execute the autoscript.sh and hopefully we will be getting a shell vis nc listener.
Finally, we got the shell.

Method 5 – Exploiting PATH variable
What is PATH?
PATH is an environmental variable in Linux and Unix-like operating systems which specifies directories that hold executable programs. When the user runs any command in the terminal, it searches for executable files with the help of the PATH Variable in response to commands executed by a user.
It is very simple to view the Path of the relevant user with help of the command “echo $PATH”.
How does this let us escalate privileges?
Let’s say we have a SUID binary. Running it, we can see that it’s calling the system shell to do a basic process like list processes with “ps”. Unlike in our previous SUID example, in this situation we can’t exploit it by supplying an argument for command injection, so what can we do to try and exploit this?
We can re-write the PATH variable to a location of our choosing! So when the SUID binary calls the system shell to run an executable, it runs one that we’ve written instead!
As with any SUID file, it will run this command with the same privileges as the owner of the SUID file! If this is root, using this method we can run whatever commands we like as root!

After seeing the above snap we observed that ./script is performing the ls command.
So we changed the value for ls as below procedure

And on executing the ./script again we got the shell.
This concludes with some basic methods to escalate privileges in Linux.
Discover more from Information Security Blogs
Subscribe to get the latest posts sent to your email.
